How to deploy an admin panel on Platform.sh in 5 minutes

Platform.sh is one of the greatest PaaS solution, designed to ease web app dev with everything in one place - from building to hosting. It takes care of the infrastructure, so developers can focus on creating the app.
You can quickly launch your web framework and database for a new project with Platform.sh in just a few moments.Having experienced this with Platform.sh, we immediately understood the potential value of working together and realized that the symbiosis would be incredibly beneficial.
The goal is to have an automatically generated and deployed admin panel on top of each project created on Platform.sh. This allows you to have a convenient interface to carry out CRUD operations on your data and implement any business processes for operational teams.
Upgrade instantly your Platform.sh infrastructure with a powerful Admin Panel
One of our primary objectives between our companies is to create a product that developers would be pleased with, thus providing an outstanding developer experience. This is fundamentally engrained in our respective companies' DNA.
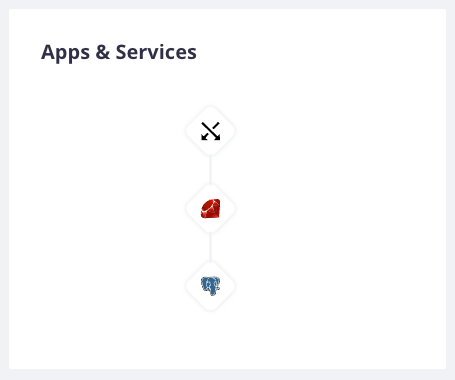
Creating a Platform.sh sample project
Let's say you have just created a project on Platform.sh. As an example, I have used the Ruby on Rails template. After a few seconds, a Rails boilerplate app and a PostgreSQL database will be deployed in your project.
Installing the Platform.sh command line
Then, you need to install the Platform.sh command line: https://github.com/platformsh/cli.
Tunnelling your PostgreSQL instance locally
After you have installed the Platform.sh CLI, you need to create an SSH tunnel between the PostgreSQL instance hosted on Platform.sh and your localhost environment. To do so, simply type platform tunnel:open && export PLATFORM_RELATIONSHIPS="$(platform tunnel:info --encode)" in your terminal.
Importing sample data to your PostgreSQL
In this demo, we will use a sample dataset SQL script to seed the database. Simply type the following command line in your terminal to create the SQL script used in this article.
cat >> sampledataset.sql <<EOF
CREATE TABLE departments (
    department_id SERIAL PRIMARY KEY,
    department_name VARCHAR(50) NOT NULL
);

INSERT INTO departments (department_id, department_name) VALUES
(1, 'Marketing'),
(2, 'Sales'),
(3, 'Finance'),
(4, 'Operations');

CREATE TABLE employees (
    employee_id SERIAL PRIMARY KEY,
    first_name VARCHAR(50) NOT NULL,
    last_name VARCHAR(50) NOT NULL,
    email VARCHAR(100) NOT NULL UNIQUE,
    hire_date DATE NOT NULL,
    department_id INTEGER NOT NULL REFERENCES departments(department_id),
    salary DECIMAL(10,2) NOT NULL
);

INSERT INTO employees (employee_id, first_name, last_name, email, hire_date, department_id, salary) VALUES
(1, 'John', 'Doe', 'john.doe@email.com', '2020-01-01', 1, 50000.00),
(2, 'Jane', 'Doe', 'jane.doe@email.com', '2020-02-01', 2, 60000.00),
(3, 'Alice', 'Smith', 'alice.smith@email.com', '2019-12-01', 2, 55000.00),
(4, 'Bob', 'Johnson', 'bob.johnson@email.com', '2020-03-01', 3, 70000.00);

CREATE TABLE projects (
    project_id SERIAL PRIMARY KEY,
    project_name VARCHAR(50) NOT NULL,
    start_date DATE NOT NULL,
    end_date DATE,
    department_id INTEGER NOT NULL REFERENCES departments(department_id)
);

INSERT INTO projects (project_id, project_name, start_date, end_date, department_id) VALUES
(1, 'Marketing Campaign 1', '2020-01-01', '2020-03-01', 1),
(2, 'Sales Initiative 1', '2020-02-01', '2020-04-01', 2),
(3, 'Finance Audit', '2020-03-01', '2020-05-01', 3),
(4, 'Operations Efficiency', '2020-04-01', '2020-06-01', 4);

CREATE TABLE employee_project (
    employee_id INTEGER NOT NULL REFERENCES employees(employee_id),
    project_id INTEGER NOT NULL REFERENCES projects(project_id),
    PRIMARY KEY (employee_id, project_id)
);

INSERT INTO employee_project (employee_id, project_id) VALUES
(1, 1),
(2, 1),
(2, 2),
(3, 2),
(3, 3),
(4, 4);
EOF
Then, list your Platform.sh projects and get the correct Project ID by simply typing platform in your terminal.
Finally, import the sample data by typing platform sql --project odfvpgblyxths -e main < sampledataset.sql.
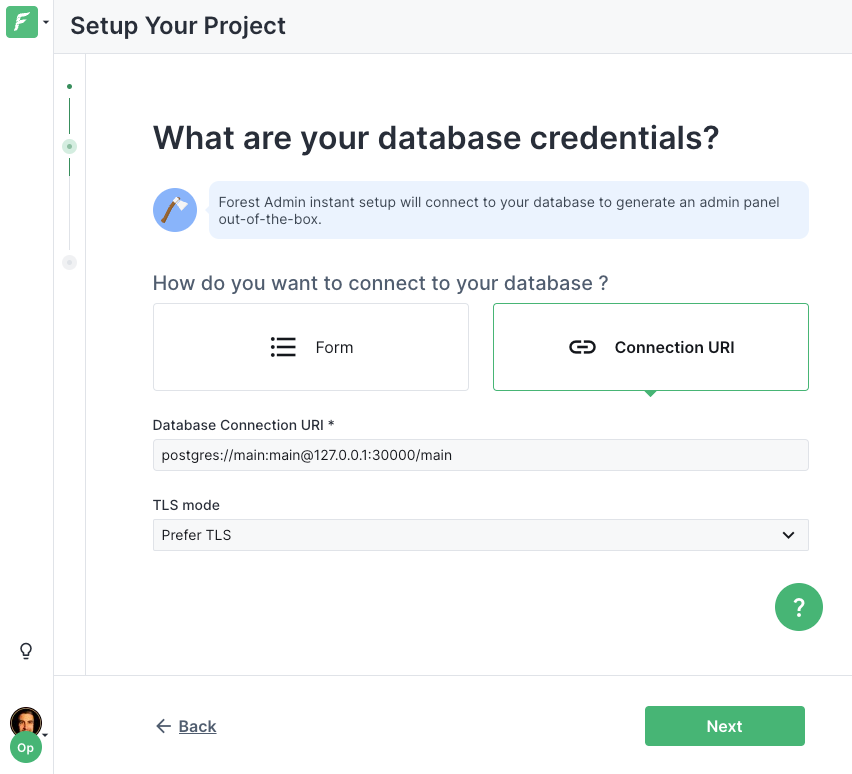
Creating a project into Forest Admin
Once completed, you can create a Forest Admin project. In this example, we will use a "microservice" architecture with a "PostgreSQL" data source. The connection URI of the database is postgres://main:main@127.0.0.1:30000/main.
Then, follow the onboarding instructions and generate your local Forest Admin Backend. In my example, I have to type this command line:
forest projects:create:sql "HelloPlatform" --applicationHost "localhost" --applicationPort "3310" --language "typescript" --databaseConnectionURL "postgres://main:main@127.0.0.1:30000/main"
Finally, install the dependencies and run your admin panel:
$ cd "HelloPlatform"
$ npm install -s
$ npm run start:watch
And voilà, your admin panel is now fully ready, plugged into a Platform.sh project!
